My Journey in Open Source

One can raise an argument saying “is the competitions like GSoC and Outreachy , really helpful to open source or do they just create short term contributors who will only contribute for the monetary gain?” Being a constant open source contributor in various projects and organisations I have seen the same. I have seen students who only contribute having the monetary gain in mind and seen them disappear when they are not selected, or the program finishes. But everybody isn’t like that. These programs just create the opportunity and provide that extra push you need to step on board.

I also started my journey in open source from a program like that. Few years back (in 2014), I wanted to start contributing to Open source and I saw that GSoC is a good opportunity. So I start searching for projects and organisations which align my interests. Wikimedia foundation was one of my top choices. I whole heartedly support their mission of making knowledge open to anyone who desires it. Wikipedia has taught me lot of things. It was time to give back. When I was searching through their projects list I found out about Wikimedia labs sub community and their project on improving documentation for the new comers. Wikimedia Labs provides a platform to host wikipedia related bots by community members. I found it very interesting and matches my abilities in technical documentation nicely. Since it was not a coding project it wasn’t listed in GSoC projects, but it was listed under FOSS OPW (now Outreachy) projects. That is when I found about FOSS OPW.

FOSS OPW (now Outreachy) is a GSoC like program which helps people from underrepresented groups such as women, cis, trans, gender queer people, to get involved in open source. It doesn’t limit your contributions only to code. You can find projects in documentation, design, marketing apart from coding. So whatever is your passion, you can find a role in open source.

Wikimedia is a very welcoming community to new comers. It taught me most of the things I know about the open source and open culture. My mentor was Andrew Boggot. My initial task was to review the main page and getting started page in Wikimedia Labs wiki . Since I was new to the community and the wiki, the task was ideal for me. They wanted the perspective of a new comer so that they can improve it to make new comers more welcoming. Then they asked me for a demonstration of the main page and the changes it needed  as a follow up task. By the time I completed these tasks I was pretty much comfortable with Wikimedia labs platform. Then I prepared my proposal for Outreachy which got accepted upon submission.

My job was to improve the documentation of Wikimedia labs to make new comers’ lives and the existing contributors’ lives easy. One of the significant contributions is to make the documentation of every project (bot) hosted in Wikipedia Labs complete and easily queryable. In that way new comers can easily get an idea about what projects are open for contributions and what projects are finished. It also helped the administrators to identify the status of each project for administrative operations. My progress report and final summary can be accessed from here. After the project ended, I continued to contribute to the other sub communities as a Wikidata item editor, Media wiki translator, etc.

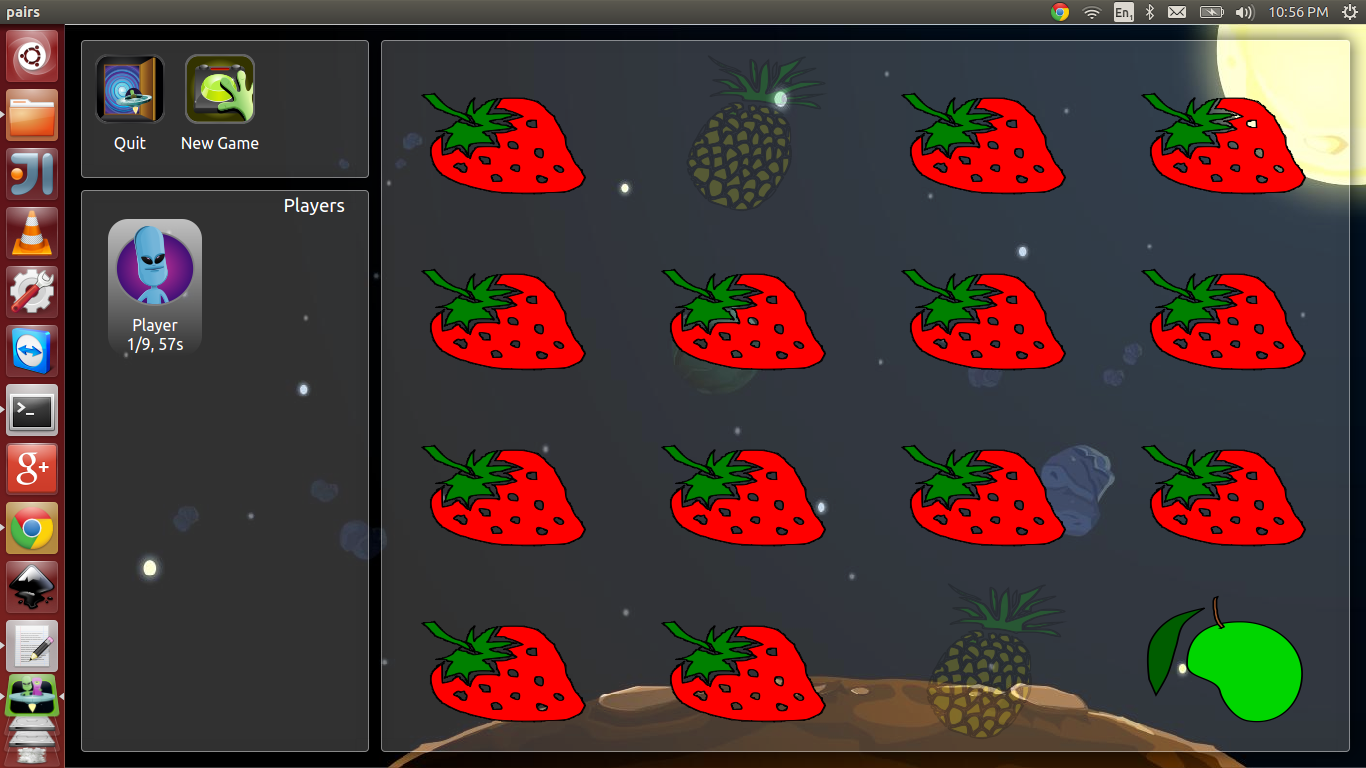
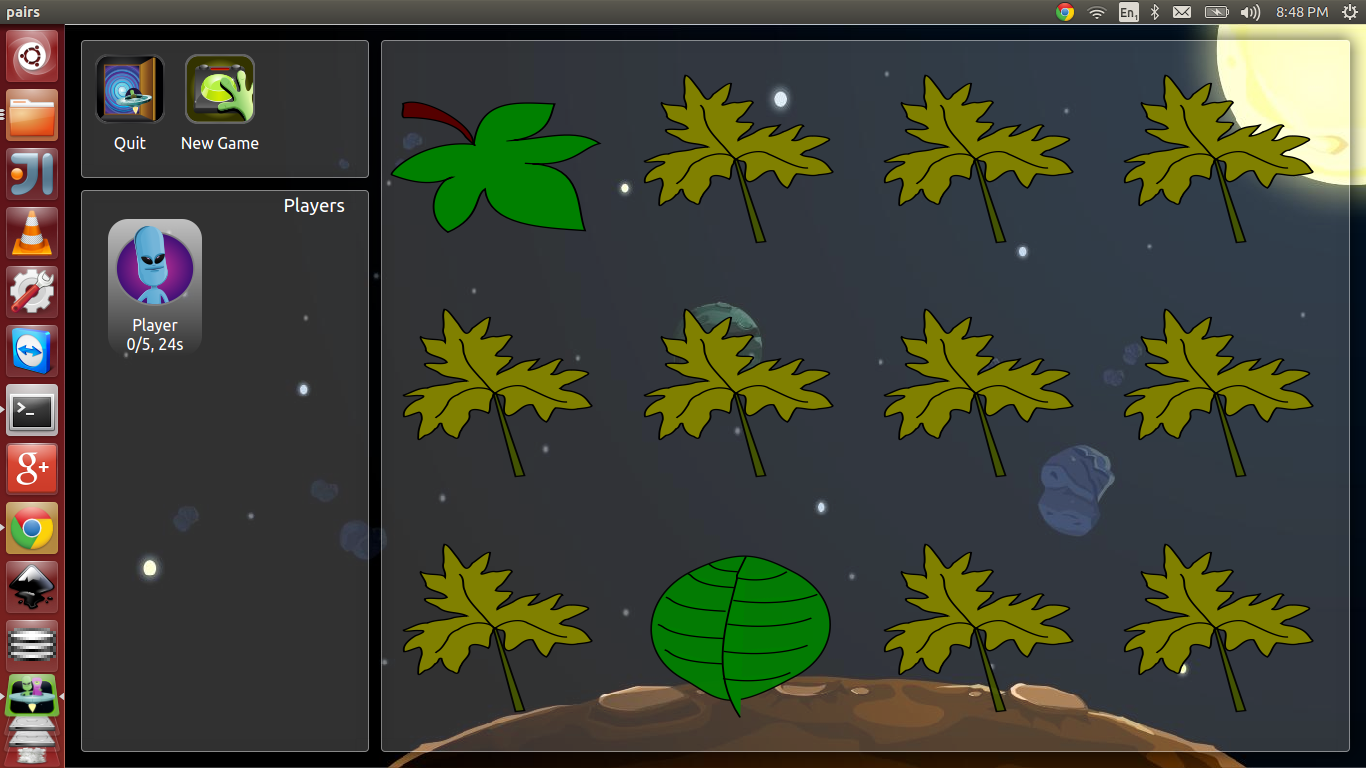
Ending my FOSS OPW internship with Wikimedia didn’t ended my enthusiasm to contribute to open source. That is when I found about Season of KDE (SoK).  It differs from most of the open source programs since it doesn’t offer money. Since I wasn’t in open source for money, it suited me well. It was also open to other disciplines apart from coding as well. The project which caught my eye was “Theme Designing for Pairs”. What I had to do is design different themes for the KDE-Edu project “Pairs”. You can read all about it here.

Meanwhile I was selected as a scholar in “Learn IT, Girl” first edition. It is a global mentorship program where a scholar is matched with a mentor to learn a programming language from the scratch and do an open source project. My project was “Expense Splitter”. It is a platform developed from Ruby to make the splitting money easy among your friends. When we go out with friends and buy something to eat or drink, usually one person pays for all and others pay him/her back immediately or later. Expense splitter track these expenses and allows the creditor to send the notifications to debtors. It will help you manage your debts and settlements. I was able to successfully finish the project and pass the program. Not only that my project has been selected as one of the best projects and added to their showcase. In future I expect it to expand to Android and iOS platforms so that the expenses can be recorded immediately since you have your phone with you always. After having an awesome experience in the first edition, I volunteered to be in the organising committee for the second edition and also selected as a mentor so that I can give back what I learnt during the first edition and what I already knew.

My most constant and significant contribution to open source lies with Systers. Systers is an Anita Borg Institute Community whose objective is to improve the female participation in tech and allow them a safe heaven through systers mailing list. In the open source perspective, systers is an umbrella organisation for GSoC. It has some of their own projects and some of the collaborative projects with Peace Corps and Mailman. The project I contribute to is “PCSA – Peace Corps Safety App”. Peace Corps aims to provide a compassionate and supportive respond to all the volunteers who have been sexually assaulted. PCSA mobile app supports this initiative by letting the Peace Corps Volunteers to report and gain information on Peace Corps Safety and Security procedures. The Android version of the PCSA started with GSoC 2015 where I was one of the mentors of the project. After the GSoC we proceeded with the app implementation with the counter contributors. We also participated in GCI (Google Code In) 2015. For GSoC 2016, we started the iOS version and a web front end for the app. I am currently the lead mentor of the PCSA-Android for GSoC 2016. Throughout the project lifetime, I have been the primary maintainer of the repository. My responsibilities included reviewing and validating issues, reviewing and merging pull requests and project management. I also maintain the project wiki.

Maintaining an open source repository comes up with lot of challenges. Handling traffic, determining what’s best for the project, maintaining a positive community sense are few of them. It is hard to reject a pull request which is not needed for the project, although its author has put a significant effort in that. You should be technically sound to reply the arguments the authors put forward in justifying their choices in code reviews. You need to have a good up to dated knowledge base on the technical side of the project, in this case Android.  Hence, the impact of this project to my future goal of being a good mobile developer is invaluable.

My activities in GitHub: https://github.com/sandarumk?tab=activity

I also enjoy writing and giving advice about GSoC and starting in Open Source. Check my Quora profile here. I am also one of the most viewed writers in “GSoC” and “Open Source Projects”. If you have any problems or need tips feel free to contact me. I will be more than happy to help.

Given below is my portfolio:

Github: sandarumk

LinkedIn: Dinu Kumarasiri

Quora: Dinu Kumarasiri

Twitter: @sandarumk

GSoC Application Tips

GSoC is a good entry point for contributing to open source organizations. 2016 GSoC application process begins on 14th March. This blog post is about preparing a strong application which increases your chance of being selected.

First read my previous blog post on “Getting started in open source”to have an idea on how to start contributing to open source if you are completely new to the open source. Once you start with a particular organization, you have to submit a proposal for the project you wish to do during the summer.

Where can I find the scope of the project?

Go through the organization page and the idea page on the Google Summer of Code site. You can select a project from there. Different organizations handle the communication process in different ways. Some organization ask you to get in touch with the mentors of the project while other organizations recommend more public interactions like mailing lists or IRC channels. Read through your organization page and identify the prefered method of communication. Then go ahead and find out about the functionalaties and the scope of the project.

Does my previous contributions matter in getting selected?

It depends on the organization you are applying for. Past contributions are among the several other things which will make a good application. Following is a general list of things which will be considered when rating your application. However, the weighting depends on the organization.

  1. Technically strong proposal
  2. Previous contributions
  3. Interaction with the community
  4. Helping others
  5. Flexibility
  6. Willingness to learn

Technically strong proposal

This is your one chance to prove that you are technically sound and have the skillset which is required in the project. Your proposal should be original and convincing. It should address the expectd functionalities and scope. But you should be able to differentiate your proposal with others by adding an extra touch of creativity which will convince the mentors why you are the ideal person for the project. Different organizations handle the project proposals in different ways. Some organization asks the students to keep their proposals open. In these kind of scenarios adding something from your side which can make the project better will give you an upper hand. Even without open proposals you should make your proposal unique. But make sure you are not stepping the line by creating a proposal way different than the expected project. Copying some other person’s idea or proposal won’t help. It will affect both the proposals negatively.

In some cases organization’s asks some other non technical factors as well. Most student do not take time to answer these questions genuinly. Some tend to put answers which are directly copied and pasted from Google. Even though your techncial proposal is good, plagiarism won’t get you anywhere.

Previous contributions

Youe previous contributions make the mentors identify your ability and willingness to contribute. It may be a small one line fix, but it matters. But problem arises with the contributions which are not required to the project, So before you make an contribution, talk it through with the community. If you are going to fix a bug, make it assigned to yourself. Otherwise some other person who is also seeking for a contribution will do the same thing and it will result in redundant work. If you are going to propose a bug fix make sure to get it approved by the community.  They may suggest you some new things to add to your contribution as well. Don’t be greedy and get multiple bugs assigned to yourself. Most communities do not like this kind of scenarios. Hence it will affect adversely to your application. Always do one at a time. It will help you focus on your current work and do a better job out of it as well. It’s not the number of PRs that matter. It is the impact on your PR to the project that matters.

Interactions with the community

As I mentioned earlier, community interactions matter. The sense of community is a strong characteristic in open source. No one will blame you for asking a question which is related to the project. Community will always be there to help you. However, you have to ask better questions. If the answer you are searching for is openly avbailable, which means that you have not taken enough time to go through the project and related materials. Always keep your ommunity interactions positive. Follow the organization’s culture.

Helping others

Open source is all about helping others. You should be willing to help others when working with the community. Be active in mailing lists and IRC. If you know the solution to the problems being asked, don’t be hesitate to reply back even though you are fairly new to the community.

Flexibility

Requirements change overtime. Your time line and proposal should reflect flexibility to adapt these changes. If the mentors ask to change your proposal about a certain point, take their advice and change it. They will always know better about the project.

Willingness to learn

This is a crucial point in GSoC. If you are a novice or intermediate skilled person , there will be a lot to learn. Always try to find the answer to your problems yourself, if you can’t find them, ask them from the community. Your mentor will not do stuff for you in the project. You should learn and do yourself. In most scenarios mentors will direct the students to answers.

What if I don’t get selected?

Don’t get demotivated. Keep contributing and apply next year. What matters is not getting selected to GSoC, but your contributions to the open source.

Acknowledgement

This article is written from my experience being a GSoC mentor last year and a conversation I had with a fellow mentor. Thank you very much Shwethambara for your insight and experience on this matter.


DroidCon India-2015

Background

Droidcon India 2015 was held on 17th and 18th of December,2015 at MLR Convention Centre, Banglore. Droidcon is India’s largest Android developer conference and it is organized by hasgeek.

There were two types of diversity grants offered to attend the conference covering conference ticket, travel and accomadation; student grant and the female developer grant.The female developer grant is sponsored by Intel Software and organized by the droidcon global department.  I received the female developer sponsorship. Thank you very much Intel and droidcon global for funding my travel and accommodation to attend the conference.  I won’t be able to attend the conference without that.

I first heard about droidcon and the grants program from a friend’s facebook post. Android has always been my hobby and leisure time activity. Even though I do not get a chance to practice Android at my job, open source and mentoring has kept me up to date. As soon as I go through the event website I knew I wanted to attend. So I applied for the female developer sponsorship grant and about a week later I was notified that I got it.

Conference

MLR Convention Centre was buzzing with Android enthusiasts when I reached there on 17th morning. Upon registration, we were given the conference pass with our names and the goodie pack which included the AuraVR headset. I have been to my share of conferences and this is the first time I got the schedule printed in the conference pass. Kudos to the organizers for that thoughtful idea.

There were two parallel sessions going on the Auditorium and the Banquet Hall so that you can choose a talk or workshop according to your preference. Usually, the talk sessions were at Auditorium and the workshops were at the Banquet Hall. There were sponsor stalls from Microsoft, Uber, inshorts, epson and cube26 at the area outside the auditorium.

Food coupons were given each day at the morning and we had a choice of selecting our choice of food at the food court. Wifi name and password were given. Unfortunately, it was not stable in the first day. But it was much better on the second day.

Sessions

The first session I attended was the “Memory Dumps: Going beyond the memory” by Eric Andre of Badoo. He talked about HPROF and Badoo Memory Dump (BMD) format. You can read more on BMD at Badoo tech blog.

Next session was about modern prototyping by Soham Mandal. He initiated the talk with the importance of prototyping and talked about the tools. During the session he showed us how easy it is, by making a pototype of an app from the scratch.

The session about react was something I was looking forward from the moment I laid my eyes on the schedule. I wanted to know how will it incorporates with Android to give the developer more power. I was also wondering whether it is worth it. However, the talk was able to clear my misconceptions on react for Android (of course a little bit of google helped too ;)).

The 20-minute session about Android Studio was good for beginner level developers. But most of the seasoned developers already know this stuff.  Nevertheless, the speakers were able to keep the session alive by keeping it short and doing the demo.

In the evening, I went to participate to the VR workshop. I was hoping that it would teach to make a VR project from the scratch. But the session needed a GitHub project cloned. But with the poor wifi, it took some time to get the code and due to some configuration changes some more time was wasted to make it up and running. However, they explained the important functions and how they are implemented.

After the tea break, there was a session on building better android apps with MVP. The session was very fast faced and it took me a lot of effort to keep up. Nevertheless, the session was worth it.

The second day started with the “Where do android tests belong”  talk by Nazneen and Vidhi. Although it didn’t teach me something new since I have a special interest in testing, for others it would have been a most important one.

Next was the “Google talk” by Vikram Aggrawal. Although it wasn’t much focused on technical side it was able to freshen up the audience with the cute pics of puppies and kittens. It also gave a brief idea on the development process at Google.

One of the most interesting session from the conference for me was the next session on “Onboarding new users on your Android app” by Elvis D’souza. He was able to give a good value addition to his talk with real app examples.

Azure mobile app engagement” by Abhishek also caught my interest. Needless to say, the whole time I was comparing Google Analytics and searching on the comparison while trying very hard to listen to what the speaker says as well.

The conference ended wth the session on Realm which was another great session because throughout my app development career I have never even thought of replacing SQLite. So it really opened my mindset to search for new and better possibilities.

Epilogue

At the end of the two days, I have learned a lot and met some great people. It got me thinking on some aspects, specifically on app architecture and user interface. Most importantly some good app ideas came to me during the sessions as well. HasGeek has done a fantastic job with organizing. Apart form the wifi problem they deserve 5 star rating.

The photos of the event from organizers can be acessed here.

The videos of all the talks can be accessed here.

Once again thank you very much Intel and droidcon global for the sponsorship. Without it, I wouldn’t be able to experience this amazing conference.


5 least used Git hacks

Git is undoubtedly the best thing happened to the programming lifecycle. To the people who don’t know git, it is a widely used version control system for software development. While git being git , saves most of the troubles software engineers having related to versions, collaborating, going back and forth in developing features and adding them to the software, there are lot of commands in git which are not very commonly used but saves your time in a great deal.

(This article assumes that you have a basic understanding of git workflow)

Git stashing

Whenever you have any uncommitted changes in your git repository and you want to change the branch, you may have come across the following error.

Capture

When you have uncommitted changes which you still want to keep, then you just have to type “git stash”. It will record both your staged and unstaged changes internally. When you are ready to comeback to your incomplete work you just have to type the command “git stash apply”. This command will only apply your most recent stashed changes.

You can see your stash history by “git stash list”, It will give you the list of stashes which are stored. If you want to apply an older stash, you have to specify the name with the command like “git stash apply stash@{1}”.

Capture stash list

Git doesn’t provide a command like “git stash unapply” to unapply a stash. If you want to unapply the changes that came from the stash , you have to do it by simply retrieving the patch associated with a stash and apply it in reverse using “git stash show –p | git apply -R”. This will revert the changes in the most recently applied stash. If you want to specify a stash to unapply you can use the above command as this “git stash show –p stash@{1} | git apply -R”.

If you are more into it , you can also create a git unapply command yourself so that you don’t have to remember the whole thing or google it everytime you need it by using aliases which is discussed in the last section in this blogpost.

Following are few more commands associated with stash

git stash apply –index” – When the stash is applied using the normal “git stash apply” command then your previous staged changes will be unstaged. If you want your previous position with all your staged changes staged, then you have to use the apply command with “–index”. This will give you the original position you were in before stashing.

git stash drop stash@{0}” – When you apply a stash using “git stash apply” command it will continue to stay on your stash list. To remove your stash from the list you can use the above command.

git stash pop” – If you want to apply the stash and immediately remove from the list, then you can use the above command.

One of the other use cases of using stash can be like this. You have two feature branches in your git repository named feature1, feature2. You start developing something in feature1 branch and suddenly you figure out this is not something you need in feature1 branch, but needed in feature2 branch. All you have to do is stash the changes, switch the branch to feature2 from feature1 and apply the stash. Applying the stash might cause you merge conflicts. But if you are using git you should have lot of experience in resolving merge conflicts. So I am not going to focus on them here.

Git reset

This is not very uncommon command as you may have expected. But I am sure the only command you use all of the time is “git reset –hard”. But there is more to the reset command.

If you want to unstage a file or set of files from the staging index, you can use the “git reset” or “git reset <file_name>

If you have a commit to undo you can use “git reset –hard HEAD~1” or “git reset –hard“. 1 can be replaced by number of commits you want to undo. If you want to move some commits to a separate branch, all you have to do is make a branch from the branch currently you are in and then undo the commits. In this scenario you will have the commits safely on the branch you created new.

Suppose while you are working on a certain branch and suddenly you got to fix a bug in another branch. But your current work is not completed. So instead of stashing them you just commit the changes of the working directory and checkout the other branch and fix the bug. But when you return to your previous branch, the last commit of it would contain incomplete work. So you can use “git reset –soft” to revert the commit and keep the changes in the index. So you can start completing work from there.

If you want to remove a file from the index before a commit you can use “git reset <filename>”.

Git ignore

There are standards defining what types of files you should commit and not. If you are a collaborator of a large project, you may have come across what kind of files to commit and not. Most probably these are the files related to your IDE. You can use a .gitignore file in your repository to mention all the files which should not be tracked intentionally. A .gitignore file should be committed in your repository in order to share your ignore rules with other collaborators. Github provides a list of recommended .gitignore files for popular operating systems, environments and languages. (https://github.com/github/gitignore)

But if you have a file which is already tracked by your repository adding that to the .gitignore file will not stop git from tracking it. So you have to manually remove it.

Each line in .gitignore file specifies a pattern . # denotes a comment. ‘!’ can be used to negate patterns. Sample .gitignore file would look like this

#Complied Object Files

*.slo

*.lo

*.o

*.obj

# Precompiled Headers

*.gch

*.pch

Git cherrypick

This is the most useful command which will get out of you from most of the problems. Git cherrypick allows you to merge a single commit from one branch to another. This is very useful in situations which you do not merge the whole branch because of inconsistencies in versions and etc. cherrypicking is very simple. You have to first get your hash of the commit. You can use git log or any other preferred method. If you are using github the yellow highlightes numbers represent the hash associated with each commit in the following picture.

hash.PNG

Then all you have to do is use the command “git cherry-pick <hash>” in the branch you want to apply the commit.

Git aliases

Aliases is the most amazing concept of git which will let you own it. Here is how it happens. If you are too lazy to type the git commands you can add short aliases for them. For example let’s take the command “git checkout” . You can create an aliase “c” for it by using the following command “git config –global alias.co checkout”. Then next time when you need checkout you just have to say “git c” instead of “git checkout”. As we discussed earlier in the stashing section you can create your own “git stash unapply” command using “git config –global alias.stash-unapply ‘!git stash show -p | git apply –R


Resources: https://git-scm.com/docs

Getting Started in Open Source

Last week I have met several college students who are willing to contribute to open source but do not know where to start from. Few years ago I was in the same boat. Since GSoC 2016 is getting nearer and students have already started to find organizations and start contributing, this would be the ideal time to publish the post.

Get your skills and abilities listed

Fist you have to analyze your self. You have to figure out what you actually want and what are you comfortable with. For example you may be an expert in Android and want to contribute to a project related to Android. Or else you may know the basics in Android, by contributing you want to get more experienced. In a completely different scenario, you know Java but you want to contribute to c++ project to learn c++ while contributing. So there can be many reasons why you want to contribute to open source. First take some time. Take a pen and paper and write down what you really expect from contributing to open source.

Once you know what you want, you have to figure out your strengths and weaknesses related to that area. Then you will be able to get a good understanding on for what you want to contribute. Once you get your skills and abilities listed with your expectation you can start finding a project.

Select a project or two to contribute

Many people have this misconception that finding a project to contribute is the most difficult thing in the process.  Believe me it is not. Once you know what your expectations are, you have to list out what kind of a project you need. You have to focus on the project’s technical details for this. For example you are a java expert and you want to learn c++ in the process of contributing, selecting a java project is not going to work. So you have to identify the technical details such as programming language and focus of the project (such as algorithms, machine learning and data science).

Once you figure out the details you can directly search an open source project which matches your specification in google. Another way is go to the last years GSoC page and search your specifications. Then you will find the related projects.

Make a list of projects you like and go through each and every project. Most projects maintain wikis and you can find them in their start contributing page or similar pages. Read through them and try to understand what the projects are about. According to your understanding on them select one or two projects of your interest. Then comes the interesting part.

Subscribe to their mailing list

Once you found the project, subscribe to their dev mailing list. Most projects have the details on how to contribute/ getting started sections. If you are not comfortable introducing yourself to the community just yet, wait for some time and read the mails coming from the list. If you do not understand anything they are talking about, just ignore them. But by reading these mails you will get a good idea about communication and  Do not try to overthink and ditch the project and start another.

Shoot an introductory mail

Once you are familiar with the mailing list and mailing list etiquette, send an introductory mail to the mailing list introducing your self and asking them  to help you on getting started. In most of the cases as a result to this question , a community member will direct you to a page where there will be some beginner tasks related to the projects listed. You can read about them and claim a task. The way of claiming a task is different from organization to organization. In most organization when you go to the ticket of that task, you can comment and clarify your questions and tell them that you are interested in doing that specific task. Then they will assign it to you.

Start Contributing

Now that you have introduced yourself to the community and found a task, you can can start working on the tasks. In most of the open source projects, they use git for version controlling. What you usually have to do is fork the project, make changes to the code according to the task you are assigned and then make a pull request to the project’s repository in the organization. You can ask from the community about how they are going to do this.


GHCI Preconference Tips

Since GHCI (Grace Hopper Celebration of Women in Computing India) is getting near , here are some tips for the first time attendees to make your experience a comfortable one.

Plan your travel itinerary.

If you are an outstation attendee and haven’t been to Bangalore before, it’s better to plan your travel itinerary before arriving at Bangalore. Plan the travel details from the airport to your accommodation and, from your accommodation to the conference. If you are unfamiliar with the local language and area, you can always use the Google map offline feature and save the route beforehand so that you can even use the Google map with the gps to identify your location and route without an internet connection.

Plan the sessions you want to attend beforehand.

In GHCI there are several sessions going parallel. So deciding the sessions which you want to attend can be a little bit tricky, since all the sessions looks promising. So before coming to the conference take some time and read the detailed version of agenda and description of sessions. Never judge the session from its name. Go through the detailed description of each sessions and figure out the sessions you need to attend.It’s better to be prepared early to avoid last minute mistakes of missing your favorite sessions. Remember that during the conference sometimes the sessions can change and the changes will be notified. You can also use the Convene app for the conference. Believe me, it will make your life easy.

Go to the conference venue early (first day).

In  the first day, registration ques tend to be long. To avoid the long ques get there early and then you have the time to get familiar with the conference venue before the conference starts.

Google Test with Visual Studio (2010) – A Quick Start Guide

Google Test is the Google’s framework for writing C++ tests on variety of platforms. For more information you can go to Google Test project home. Google Test is not the only C++ testing framework. You can find full list of C++ testing frameworks here.

However setting up Google Code and writing the first test case might be little challenging for a first time user. This blog post will walk you through setting up and running your first test case using Google Test.

1. Downloading and build Google Test

Go to the Google Test home page : https://code.google.com/p/googletest/ and select the second tab which is “Downloads”. Then you will be presented the available versions of Google Test. Select one and download.GoogleTestDownload

Once downloaded and extracted, you will find a “msvc” folder inside. In there you will find “gtest” visual studio solution file. Open that in Visual Studio. You will find  the following 4 projects.

gtestProjectStructureClean and build gtest and gtest_main projects.  For this scenario only a debug build is sufficient.

2. Create a project and write a program which you need to test.

Once you have built the gtest project , create a new project in Visual Studio. For demonstration purposes I made a simple calculator application. Calculator.h and Calculator.cpp is as follows.

Calculator.h

class Calculator
{
public:
int add(int a, int b);
};

Calculator.cpp

#include "Calculator.h"

int Calculator::add(int a, int b)
{
return a+b;
}

Now starts the sticky part. Before getting your hands dirty I highly suggest you go through this article in Google Test documentation. If you are just lazy, never mind . Just continue with following steps.

At this point you have a method to test (add method in calculator class). Now you have to create the main class. There is a boilerplate main class provided by Google Test documentation. But since we are not going in depth in this stage following is the edited main class which will suit for our requirement.


#include "Calculator.h"
#include "gtest/gtest.h"

namespace {

class CalculatorTest : public ::testing::Test {

};

// Test Calculator::add method
TEST_F(CalculatorTest, CalculatorAddMethod) {
Calculator cal;
EXPECT_EQ(10, cal.add(6,4));

}

}

int main(int argc, char **argv) {
::testing::InitGoogleTest(&argc, argv);
RUN_ALL_TESTS();
getchar();
return 0;
}

3. Project Settings Configuration

Now you have to configure the following settings. Right click the project and select Properties.

3. 1 Additional include directories in C++

Configuration Properties -> C/C++ -> General -> Additional Include Directories -> Edit

add path of the include directory in the gtest folder you downloaded.

ConfigurationProperties13.2  Additional Library Directories in Linker

Configuration Properties -> Linker -> Additional Library Directories -> Edit -> Select the debug directory of the msvc folder in gtest downloaded folder.

ConfigurationProperties23.3 Additional Dependencies in Linker

Configuration Properties -> Linker -> Input ->Additional Dependencies -> Edit -> Add gtestd.lib and gtest_maind.lib.

ConfigurationProperties33.4  Runtime Library in C/C++

Configuration Properties -> C/C++ -> Code Generation ->Runtime Library -> Select “Multi-threaded Debug (/MTd)”

ConfigurationProperties44. Build and run

Now if you build and run the test, it should give you the following output.

PassingTestThis is how it will look like when all the tests are passed.

Now change the assertion line in main.cpp to following.

EXPECT_EQ(10, cal.add(6,6));

In this case our assertion is wrong, hence the test should fail. Now build and run this and you will get the following output.
FailingTest

Vi To the rescue!!

Prologue:

(You can skip this part and start straight from the introduction.)

Two months ago I would never have thought that I will end up writing a blog post about vi or even use vi as my primary code editor. I was more of a IDE type of person. I have experience is using CodeBlocks, Netbeans, Eclipse, IntelliJ IDEA and Visual Studio.

My first IDE was CodeBlocks which I used to write small programs in C, when I was learning to program. Then When I started development in Java I moved in to Netbeans. The transition was a swift one at that time, because I was only using CodeBlocks for few weeks. Since then Netbeans was my favourite IDE until I started using Eclipse. I had to move to Eclipse because I started Android develeopment and it was bit hard to adapt to Eclipse from Netbeans. But when the time passes and when I get familiar with Eclipse, I started loving Eclipse in the same way I loved Netbeans. Then again due to a certain project requirement I had to code in IntelliJ IDEA. At first it was really an eyesore for me. I didn’t even like the look and feel of IDEA. But as soon as I continue to work in IDEA, I figured that it is far more easy and efficient than eclipse.

Given that background of IDEs, I was never a fan of using text editors as code editors. But due to  a certain work requirement, I was asked to use vi as my primary code editor and that is for a language that I am not even familiar with. Needless to say the the learning curve became very high. I had to learn a new language and on top of that do it on a text editor without entering the comfort zone of IDE.

Reluctant to use Vi as much as I do, my first approach was coding in visual studio and copy and paste it in the Vi. But I was not very pleased with the user experience of Visual Studio. In a very short time I’ve had enough of Visual Studio and thought what the heck, I don’t need auto completion. Determined to adapt to vi I started using it a few days back. And now I am completely loving it.

Introduction:

Vi is a text editor which is designed for Unix systems. Vi’s origin goes a long way back to ‘ed’, In between Vi and ‘ed’, there are several text editors such as ’em’, ‘en’ and ‘ex’, which helped ‘ed’ to evolve in to Vi. Vi is actually the visual mode of ‘ex’ which is written by Bill Joy. But later Bill found out that people actually spend most of the time in the visual mode. Then he separated and make Vi directly accessible to the users. If you are more interested in Vi’s origin and history, you can go through the Wikipedia article of  Vi.

Vi has two modes; normal mode and insert mode. In normal mode, the keystrokes become commands where as in the insert mode they become the text inserted in the document. You can switch between modes by using ‘Esc’ (for normal mode) and ‘I’ (for inserts mode) keys.

One of the most impressive traits of Vi is you never had to take your hand away from the keyboard (to the mouse) when you are using Vi. It’s beauty lies in its configurability which provides a customized experience. On top of that you would never want to wait forever until your IDE starts. Vi loads instantaneously and allow you to do your work in the way you want to do it. If you want more testimonials on Vi users, read answers to the following Quora question.

Although at first it seems hard to adapt, at the end of the day you will be happy that you started. Below are some resources for Vi beginners , which helped me to get a hold on Vi.

Epilogue:

What if I told you that you can have the auto completion and file explorer in the Vi too? Yes. It’s possible. Vi comes with a vast amount of useful plugins. Among which Following two are my favorites.

  • Nerd Tree : Allows you to perform simple file system operations and display the hierarchical tree structure.
  • You Complete Me : Fast code completion

If you have any better resources for learning or using Vi/Vim feel free to comment. 🙂

I am a feminist, and I do not hate men

Lots of men think that being a feminist is just taking charge against the entire male population. Surprisingly, there are some women who thinks the same. But I suggest before you come and criticize feminists, just do some research first.

So what exactly is the meaning of “Feminism”? As per oxford dictionary, “Feminism is the advocacy of women’s rights on the ground of the equality of the sexes”. As per Wikipedia, “Feminism is a collection of moments and ideologies that share a common goal; to define, establish, and achieve equal political, economic, cultural, personal and social rights for women”.

So where has the “hating men” part has come from? How did that notion emerged out of nowhere and established grounds on “feminism”?

I believe that this was because that when women try to achieve their equal rights (positions), men fear that women are challenging to their stability on these positions and eventually end up stealing them. I have only a very short experience in the software industry. As per what I have experienced, men do not hate entering women in tech. In fact they love it. But the problem arises when women try to climb the ladder, Men care and nurture women when they are subordinates, but when the women try to climb up the career ladder, men tend to block it.

More over, men take the message of feminism in the wrong way. A very good example would be the women empowerment video of Deepika Padukone and how the society responds it. I believe it is the time to understand that feminism is not hating the entire male population, but empowering females to do what they like, what they want and what they are capable of.

In concluding note, I couldn’t resist sharing this video, for the sake of females who proudly say that they are not feminists.

SoK Final Report – Theme Designing for Pairs

Theme designing for pairs is my Season of KDE project, mentored by Heena Mahour. In this project i created new themes for KDE-Edu project “Game Pairs”. In SoK period I created the following themes:

Here are some screen shots of these themes in Pairs:

Fruits Theme

Fruits Theme

Vegetable Theme

Vegetable Theme

Nature Theme

Nature Theme

Stationery Theme

Stationery Theme

Leaf Structures Theme

Leaf Structures Theme

These themes will work in following game modes in “Pairs”

  • Pairs
  • Relations
  • Logic
  • Words

The most challenging part of my project is to first build and run the program. It took some time and help from KDE community to figure out issues regarding my configuration and have “Pairs” up and running in my machine.

Next step was to understand how a new theme should be added by going through the project. My mentor allowed me to do this myself rather than stating out the ways of how to do it. Adding a theme is not only about creating images and add them. It is about connecting these images to the program as well. In “Pairs” a theme is consist of set of images and a “.game” file. The “.game” file is written in xml and contain information about the images. Following is the step by step process to create and have your theme running in “Pairs”:

  1. Download KDE Pairs
  2. Extract and follow the steps in README to  build the program
  3. Run “Pairs” (After you have built and install “Pairs” you can run it by simply typing “pairs” in the terminal)
  4. When you have “Pairs” up and running, you can start creating svg images. (To create svg images, you can use software like inkscape)
  5. Create a folder in the “themes” folder in “Pairs” and add the svg images to that folder.
  6. Create a xml file “your_theme.game” and edit it following a .game file of a previous theme.
  7. Update the CMakeLists.txt file and add the following line “create_theme(your_theme)”
  8. Built and run pairs again and you will see your theme with other themes.

Another task of my project is improving documentation in KDE pairs. The user documentation for “https://userbase.kde.org/Pairs“. I even created a techbase wiki page for pairs such that other contributors can contribute to the documentation of pairs in technical side.

A very big thank you should go to my mentor Heena Mahour without whom this project will never be successful. Further more, I would like to thank KDE community who helped me through mailing list when I have issues regarding the project. Last but not least I would like to thank to the KDE SoK organizers for providing this amazing experience. I am looking forward to contribute to KDE even after this is finished.